How to Send Emails for Free Using Sendinblue SMTP in Laravel
Last Updated on October 10, 2022
Sending emails has never been easier. Nowadays, we send emails from our desktop computers, smartphones, and tablets. However, because of this, there is a lot of competition for the inboxes of email providers. This means that getting your emails to be read is difficult. Companies like Sendinblue offer a solution to this problem. They provide an email service that allows you to send and receive emails without the hassle of dealing with spam filters and other email providers. In this article, we’ll show you how to use Sendinblue SMTP to send emails from Laravel and how to track the success of your email campaigns.
What is Sendinblue?
Sendinblue is an Email Service Provider that allows you to send bulk emails, monitor email campaigns and automate email campaigns by behavioural targeting. This allows most people to get all email services on one platform. It has a lot of pre-made templates which you can use and reuse to fit your business needs.
Sendinblue also provides a free SMTP server which we can leverage to send emails from a Laravel Application. This makes it easy to have all your emails synced into one account and monitor their performance if need be.
How to send Emails using Sendinblue SMTP for Free
To use Sendinblue’s SMTP Server, you need an account. You can create a free account here. Once you have created your account, you need to activate your domain name. This will allow you to send emails from your own domain name. i.e yourname@yourdomain.com.
If you don’t have a domain name, there is no need to panic as you can use your Login email to send out emails.
To use Sendinblue’s SMTP, we can follow the following steps:
Get Sendinblue SMTP Credentials
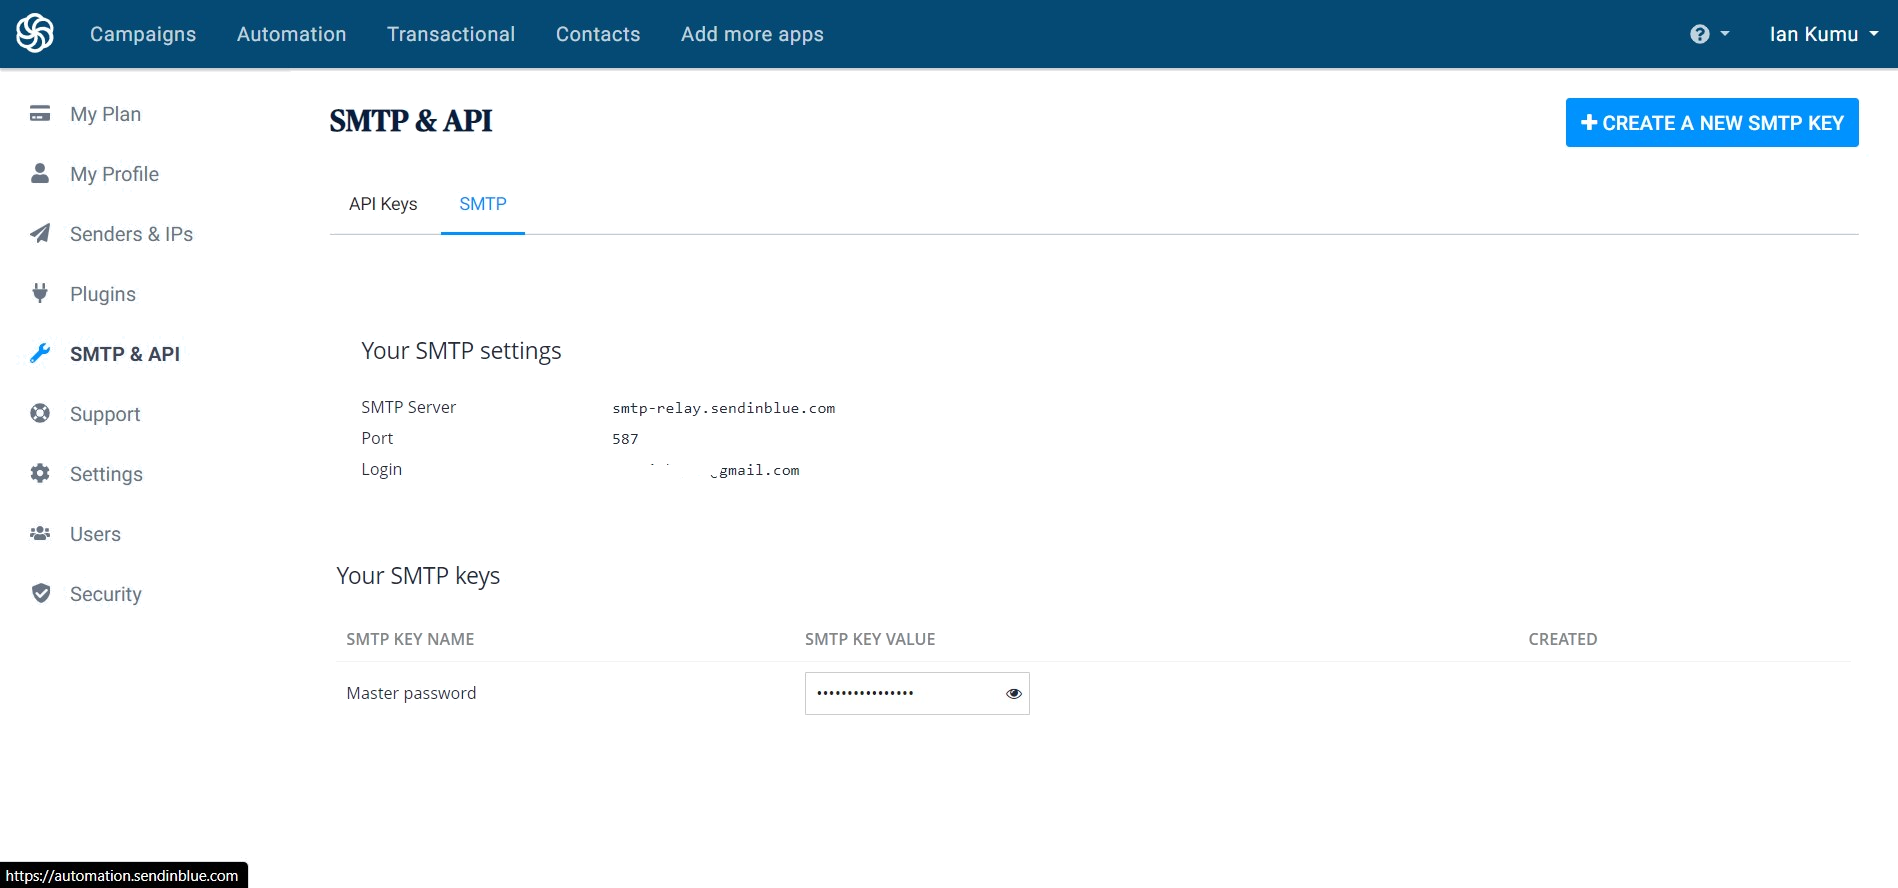
To get your SMTP Credentials, head over to the SMTP & API section and get your credentials
Add the SMTP Credentials to Laravel
The next step is to add the credentials to your .env file. Laravel provides an easy way to integrate any SMTP server credentials. The credentials should resemble the format below.
MAIL_DRIVER=smtp
MAIL_HOST=smtp-relay.sendinblue.com
MAIL_PORT=587
MAIL_USERNAME="your sendinblue email"
MAIL_PASSWORD=master password
MAIL_ENCRYPTION=tls
MAIL_FROM_ADDRESS="your sendinblue email"
MAIL_FROM_NAME="${APP_NAME}"
Send an Email.
You can now send an Email from your Mailable markdowns. Depending on how your application is set up, you can add multiple implementations such as queues and schedulers and Sendinblue should send out the emails as they are generated by your Laravel Application.
It is an easy way to send out transactional emails such as password requests and order confirmation emails. You can read this article to learn how to send emails in Laravel.
Using SendinBlue’s API in your Laravel Application.
You can combine the power of SendinBlue’s SMTP servers with their API to make better email templates and campaigns directly from your Laravel Application.
As I mentioned earlier, Sendinblue offers a lot of features which you can take advantage of. One cool feature I like is the ability to create cool email templates using their Drag and Drop editor and use the template in my Laravel Mailable Classes.
To interact with their REST API you can use this awesome package.
Installation
We can install it using composer
composer require webup/laravel-sendinblueConfiguration
The next step is to set up the configurations to use Sendinblue as the default mailer for your application. This is well documented in the package.
You can create a new API key in the SMTP and API section and add it to your Laravel’s .env file
Usage
Once everything is set up, you can now use any of your account’s features and templates. In this section, I will use one of the templates I created earlier.
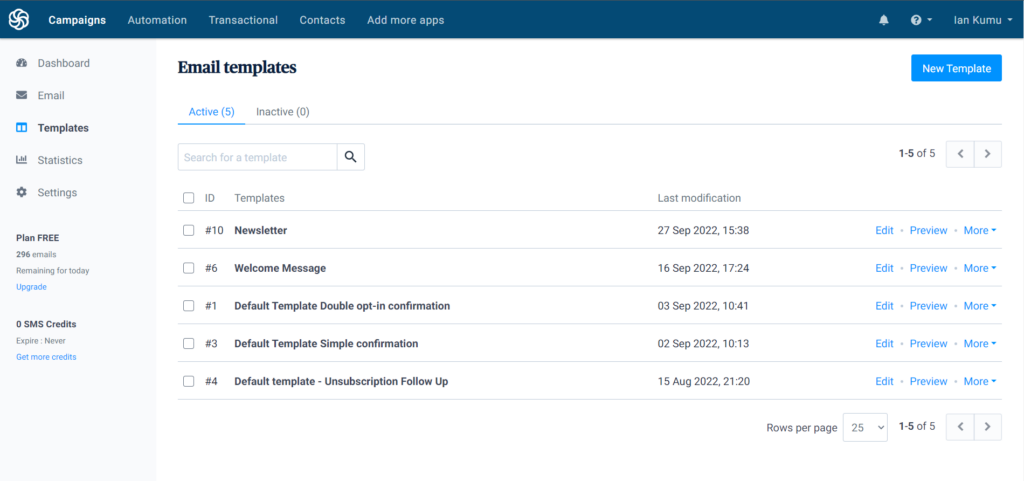
Let’s say I want to reuse the Welcome Message Template I created earlier that contains a Download Link to my Free Laravel Guide, I can use its template id and include it in my Mailable Class.
I can create a new Welcome Mailable Class
php artisan make:mail WelcomeMail I can then update the content of the generated Mailable Class
<?php

declare(strict_types=1);

namespace App\Mail;

use Illuminate\Bus\Queueable;
use Illuminate\Contracts\Queue\ShouldQueue;
use Illuminate\Mail\Mailable;
use Illuminate\Queue\SerializesModels;
use Webup\LaravelSendinBlue\SendinBlue; // <- you need this
use Webup\LaravelSendinBlue\SendinBlueTransport; // <- you need this

class WelcomeMail extends Mailable
{
    use Queueable;
    use SerializesModels;
    use SendinBlue; // <- add this trait


    public function build()
    {
        return $this
            ->view([])
            ->subject(SendinBlueTransport::USE_TEMPLATE_SUBJECT) // use template subject
            // ->subject('My own subject') // override default template subject
            ->sendinblue(
                [
                    'template_id' => 6,
                ]
            );
    }
}
Once I have defined the template, My email is ready to be sent. All I can do now is schedule a job to send out the email as soon as anyone requests the Free guide through their email. Laravel will send out the email to the user and you can have your automation ready.
Conclusion
In this tutorial, we have seen how to send emails for free using Sendinblue SMTP in Laravel. This is a free and easy-to-use email service which is perfect for beginners, small businesses, and individuals. We have also seen how to use Email Templates in our Laravel Application using the SendinBlue API.
I hope this article was insightful and you learnt a thing or two from it. Thank you for reading.


