How to Setup Nginx as a Reverse Proxy for Laravel
Last Updated on April 5, 2024
Nginx is a powerful web server that can also be used as a reverse proxy for your application.
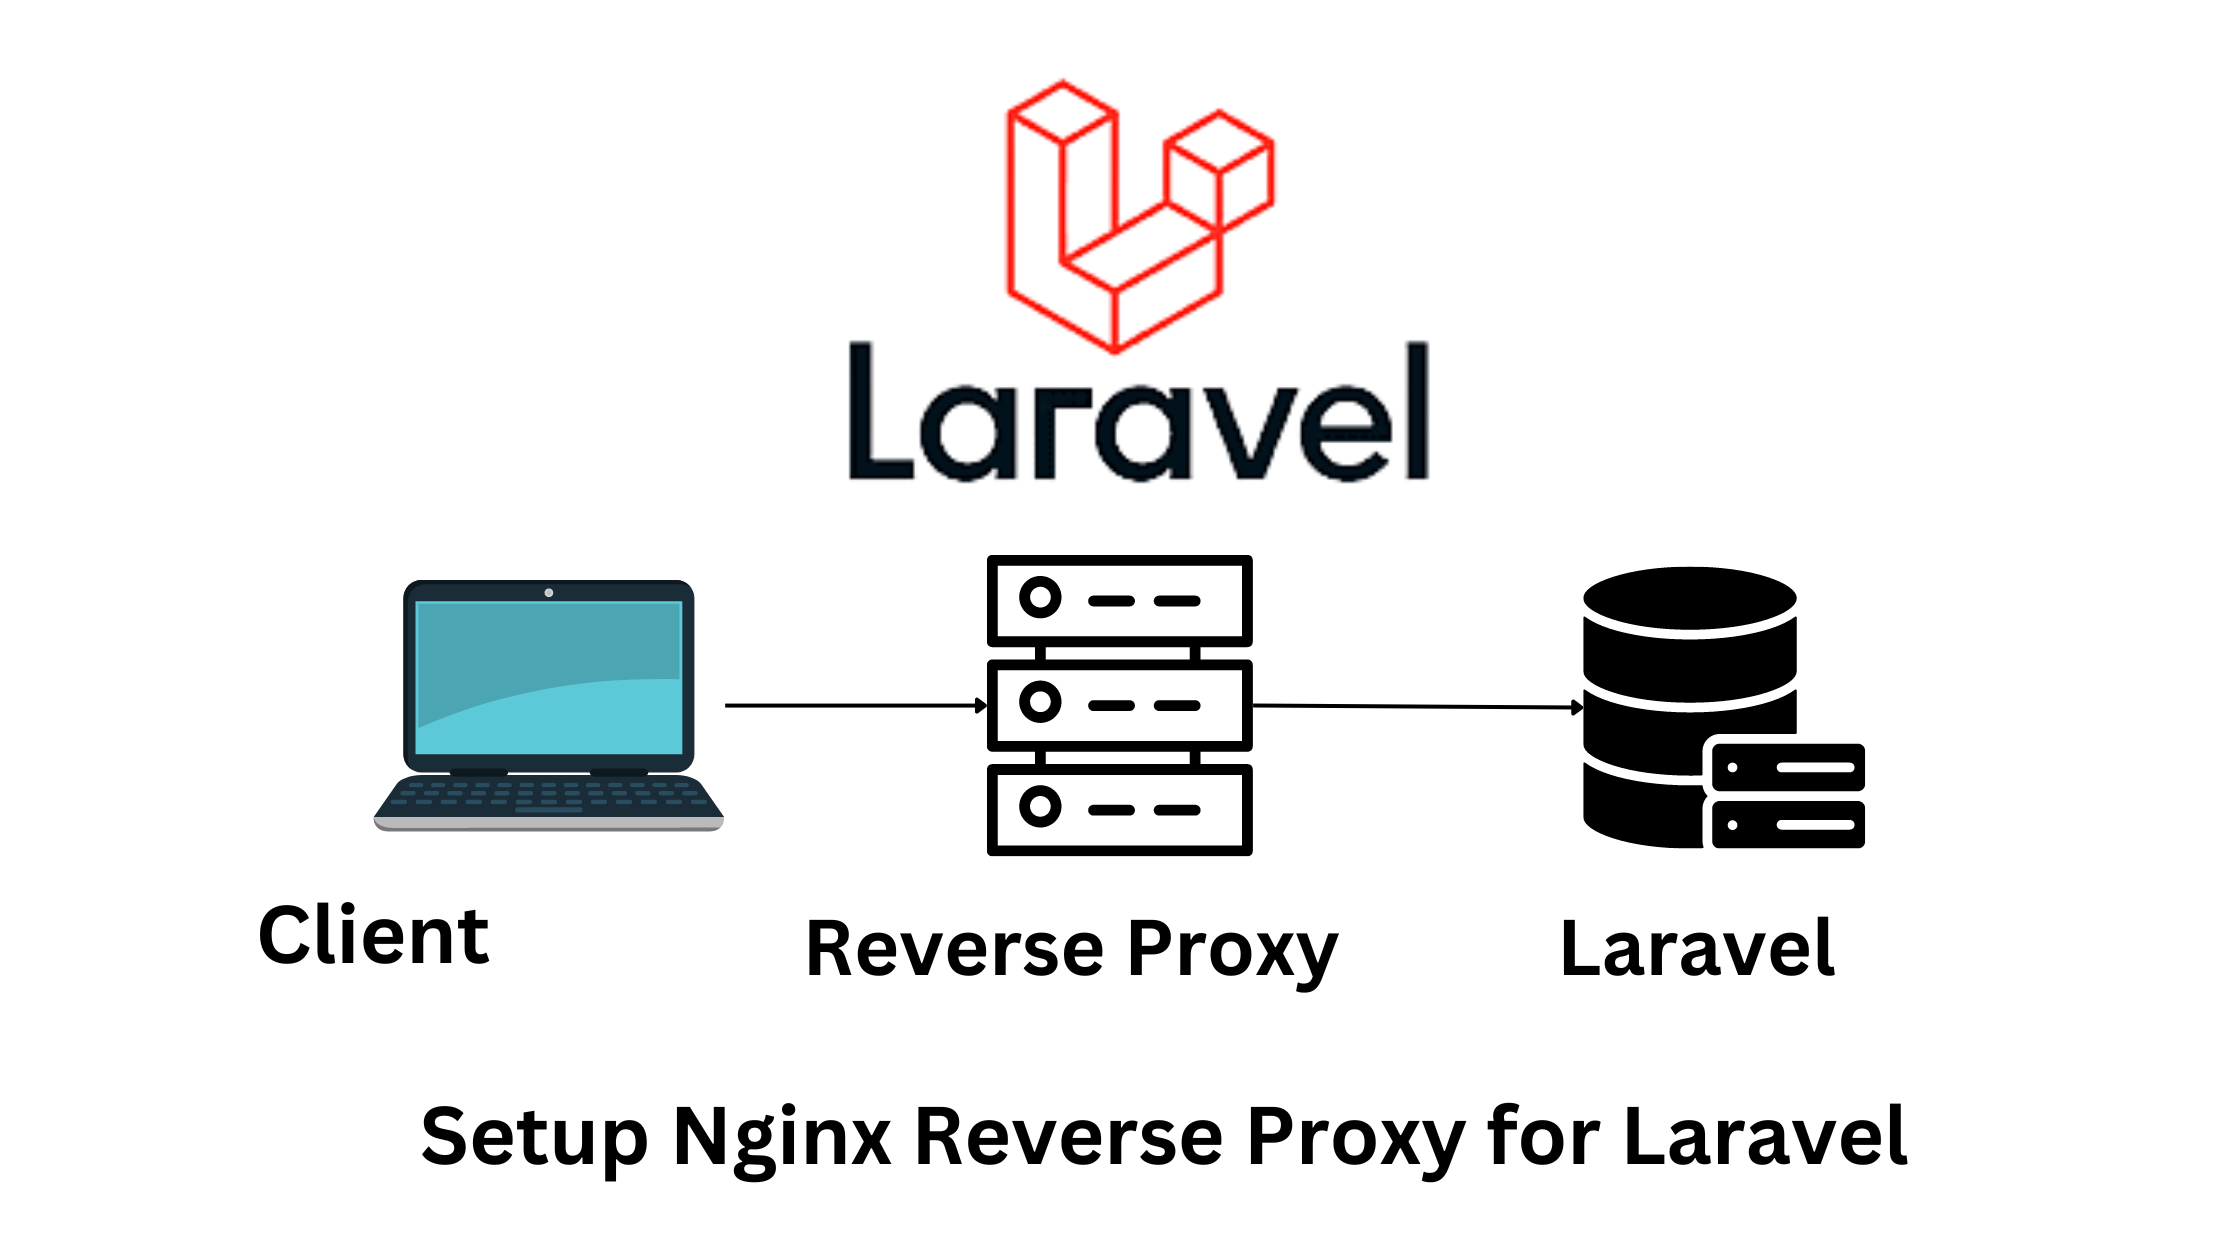
You might wonder what exactly is a reverse proxy. Simply put, a reverse proxy is a server that sits in between a client and a server. It then forwards requests to the server and returns the response to the client.
Let’s take a simple analogy of watching a movie. Imagine you want to watch a movie on your preferred streaming platform, but it is blocked in your country. What do you do? You could possibly use a VPN to watch the movie.
This way, the VPN acts as a reverse proxy and forwards your requests to the streaming platform and returns the response to you.
Of course, VPN services are not reverse proxies but the way they function can be loosely translated to reverse proxies.
So why would you need a reverse proxy for your stack?
Reverse proxies do have a lot of benefits:
- Security: Reverse proxies provide security in the sense that it protects the identity of the application server. Because they sit in between the client and server, the client only knows the IP address of the proxy server and not the application server. This can be beneficial in that it can filter out malicious requests from reaching your server.
- Caching: Reverse proxies can cache frequently requested requests, therefore, relieving the burden from your server.
- Load balancing: load balancing is a type of reverse proxy that can distribute incoming client requests among multiple servers thereby reducing the burden on your servers.
In this article, I will show you how to integrate Nginx as a reverse proxy for a laravel application. We will try and build a URL shortener service using Laravel.
Let’s get started.
How to integrate Nginx as a reverse proxy for a laravel application.
Before we begin, we will need some technologies.
- An ubuntu server
- A domain name(optional)
- SSH access to your server.
I am going to use Contabo in this example because they have very generous offers on their VPS (200GB SSD storage for less than $10).
Create a simple URL shortener using Laravel.
We can create a new Laravel application
laravel new url-shortener We will add a links table that will contain the original(long) link and a short URL. You can add more things if you plan to track clicks, IP etc.
php artisan make:model Links -m<?php
namespace App\Models;
use Illuminate\Database\Eloquent\Factories\HasFactory;
use Illuminate\Database\Eloquent\Model;
class Links extends Model
{
use HasFactory;
protected $fillable = [
'original_url', 'short_url', 'clicks', 'user_id', 'base_url'
];
public function user()
{
return $this->belongsTo(User::class, 'user_id');
}
}
Links Model
<?php

use Illuminate\Database\Migrations\Migration;
use Illuminate\Database\Schema\Blueprint;
use Illuminate\Support\Facades\Schema;

return new class extends Migration
{
    /**
     * Run the migrations.
     *
     * @return void
     */
    public function up()
    {
        Schema::create('links', function (Blueprint $table) {
            $table->id();
            $table->unsignedBigInteger('user_id')->index()->nullable();
            $table->string('original_url');
            $table->string('short_url');

            $table->string('base_url');
            $table->integer('clicks')->default(0);
            $table->timestamps();

            $table->foreign('user_id')->references('id')->on('users')->cascadeOnDelete();
        });
    }

    /**
     * Reverse the migrations.
     *
     * @return void
     */
    public function down()
    {
        Schema::dropIfExists('links');
    }
};
Links Migration File
We will then update the user table to include a domain column. When a user registers, they can add their custom domain name.
php artisan make:migration add_domain_column_to_users_table --table=users<?php
use Illuminate\Database\Migrations\Migration;
use Illuminate\Database\Schema\Blueprint;
use Illuminate\Support\Facades\Schema;
return new class extends Migration
{
/**
* Run the migrations.
*/
public function up(): void
{
Schema::table('users', function (Blueprint $table) {
$table->string('domain')->nullable()->after('email');
});
}
/**
* Reverse the migrations.
*/
public function down(): void
{
Schema::table('users', function (Blueprint $table) {
$table->dropColumn('domain');
});
}
};
Let’s add laravel breeze to scaffold authentication.
composer require laravel/breeze --dev

php artisan breeze:install

php artisan migrate
npm install
npm run dev
We can add support for custom domains. I will use this article as a guide
// App/Providers/RouteServiceProvider

<?php

...

public function boot()
    {
        $this->configureRateLimiting();

        $this->routes(function () {
            Route::middleware('api')
                ->prefix('api')
                ->group(base_path('routes/api.php'));

            Route::middleware('web')
                ->group(base_path('routes/web.php'));
        });

        Route::pattern('domain', '[a-z0-9.\-]+'); // Add this Part
    }

...
The next step is to provide logic on how the short URL will be created. Here, you can implement it in multiple ways. You can use this package to speed up the process.
For now, I will just use the Str::random method since it is a simple URL shortener.
// App/Http/Controllers/LinkController

<?php

use Illuminate\Http\Request;
use Illuminate\Support\Str;
use App\Models\Links;

...

public function store(Request $request)
{
        $slug = $request->has('slug') ? $request->input('slug') : Str::random(7);
        $url = $request->input('url');
        $user_id = auth()->check() ? auth()->id() : null;
        $base_url = $request->input('domain');

        $url_data = [
            'original_url' => $url,
            'short_url' => $slug,
            'user_id' => $user_id,
            'clicks' => 0,
            'base_url' => $base_url
        ];

        Links::create($url_data);
        return redirect()->back()->with('success','Short Url Created Successfully');
}
...
I will add the logic that will handle the redirects. We will pass the request to our application server and laravel will perform the redirect if the record is found.
// App/Http/Controllers/LinkController
<?php

use Illuminate\Http\Request;
use Illuminate\Support\Str;
use App\Models\Links;

...

  public function handleRedirects(Links $link)
  {
        $link->increment('clicks');

        $statusCode = 302;
        $maxAge = 30;
        $headers = [
            'Cache-Control' => sprintf('private,max-age=%s', $maxAge),
        ];

        return redirect()->away($link->original_url, $statusCode, $headers);
  }

...
The last step is to perform redirects. I will add a route in the routes/web.php file to do so.
// routes/web.php

<?php
use App\Http\Controllers\LinkController;
use Illuminate\Support\Facades\DB;
use Illuminate\Support\Facades\Route;
use App\Models\Links;

...

Route::domain('{domain}')->group(function () {
        Route::get('/{slug}', function (LinkController $link, string $slug, string $domain) {
            return DB::transaction(function () use ($link, $slug, $domain) {
                $url = Links::where('short_url', $slug)
                    ->where('base_url', $domain)
                    ->firstOrFail();

                return $link->handleRedirects($url);
            });
        });
    });

...
With that, we have a simple yet powerful URL shortener service.
We can now deploy the application to the Contabo vps. You can follow this article on how to deploy a Laravel application.
Install and configure Nginx
Once the deployment is complete, we can ssh into the server.
ssh 100.100.100.101We will start by updating the apt package manager
sudo apt-get updateWe can then install nginx
sudo apt-get install nginx Once Nginx is installed, we can continue.
Typical flow for the URL shortener.
Now that our laravel application is deployed, we can now understand what we built.
The idea is most URL shortener services allow their customers to add a custom domain. The customer would then update their DNS records to point to the shortener service. This could be adding an A record or a CNAME record.
Using the same analogy we would have the application server use the short.app.com domain and have a user add their custom domain(example.com).
Here, we could introduce a reverse proxy that will forward requests from the customer’s custom domain(example.com) to our shortener service domain(short.app.com)

This means all requests targeted to example.com/slug will be proxied to our applications for the application to perform the redirect.
This allows users to use their own custom domains to create short URLs and still have our application handle them as if they were native to the platform.
Now let’s create a new Nginx configuration file for the user’s custom domain
sudo nano /etc/nginx/sites-available/example.com We can add these configurations
server {
    listen 80;
    listen [::]:80;

    server_name example.com;

    location / {
        proxy_pass http://100.100.100.101;

        proxy_set_header X-Real-IP $remote_addr;
        proxy_set_header X-Forwarded-For $proxy_add_x_forwarded_for;
        proxy_set_header X-Forwarded-Proto $scheme;
        proxy_set_header X-Forwarded-Uri $request_uri;
        proxy_set_header X-Forwarded-Host $host;
    }
}
To explain some terminologies here, we are using the nginx proxy_pass directive to forward all requests to our laravel application.
We are also setting the X-Forwarded-Host header which will contain the correct hostname when we proxy the request back to laravel.
You can find more information about Nginx directives and structure here.
We can then activate the file by creating a symlink to the sites-enabled folder.
sudo ln -s /etc/nginx/sites-available/example.com /etc/nginx/sites-enabledYou should never write directly to the sites-enabled folder. All Nginx configurations should be in the sites available directory and symlinked to the site-enabled folder.
Now we can reload the nginx daemon and verify our changes.
sudo nginx -t && sudo service nginx reloadUpdate the Trusted Hosts middleware.
Since we have set our laravel application to receive requests from proxies, we somehow need to ensure that only allowed hostnames(domain names) should send requests to our application. This will prevent stray requests from landing on our application.
Most URL shortener services would store the user’s domain names. In our case, we were storing the domain names in the user’s table upon registration.
We can use this to update the TrustHosts middleware.
//App/Http/Middleware/TrustHosts.php
<?php

namespace App\Http\Middleware;

use Illuminate\Http\Middleware\TrustHosts as Middleware;
use Illuminate\Support\Facades\DB;

class TrustHosts extends Middleware
{
    /**
     * Get the host patterns that should be trusted.
     *
     * @return array<int, string|null>
     */
    public function hosts()
    {
        $hosts = [
            $this->allSubdomainsOfApplicationUrl(),
        ];

        $hosts = array_merge($hosts, (array)$this->customDomains());

        return $hosts;
    }

    public function customDomains()
    {
        return DB::table('users')->pluck('domain')->toArray();
    }
}
We will get all the domains provided by users from the database and register them as trusted hosts.
Now our application will handle requests originating from those domains only.
Update the Trusted Proxies middleware.
Since our application is seated behind a reverse proxy, we need to instruct Laravel to only respond to requests originating from that specific reverse proxy.
This helps mitigate against header poisoning by malicious attackers. This can be seen clearly in this YouTube video.
//App/Http/Middleware/TrustProxies.php

<?php

namespace App\Http\Middleware;

use Illuminate\Http\Middleware\TrustProxies as Middleware;
use Illuminate\Http\Request;

class TrustProxies extends Middleware
{
    /**
     * The trusted proxies for this application.
     *
     * @var array<int, string>|string|null
     */
    protected $proxies = [
        '100.100.100.101' // add your reverse proxy ip here
    ];

    /**
     * The headers that should be used to detect proxies.
     *
     * @var int
     */
    protected $headers =
    Request::HEADER_X_FORWARDED_FOR |
        Request::HEADER_X_FORWARDED_HOST |
        Request::HEADER_X_FORWARDED_PORT |
        Request::HEADER_X_FORWARDED_PROTO |
        Request::HEADER_X_FORWARDED_AWS_ELB;
}
Automating the process.
While this will work, it can become tedious, especially if users add a lot of custom domains. We can automate this process so that our application can create these configurations in a scalable fashion.
In the next series of this article, I will show you how to automate this process using laravel. We will use Cerbot and Laravel to generate and renew SSL Certificates at scale for user’s domain names.
Conclusion
In this article, we have covered some basic concepts of reverse proxies and how to set up one for a laravel based url shortener application.
For context, I used this approach to create a simple URL shortener service for myself. If you access this link(https://go.iankumu.com/MYerEdO) you should be redirected to my blog.
In the next series, I will cover how to automate this process using Laravel. I hope this article is insightful and has ignited a spark to learn about reverse proxies.
If you have any questions, feel free to ask them. Also, don’t forget to check out contabo’s deal.





If you use Nginx as your reverse proxy. What will serve your Laravel app?
You can still use Nginx to serve your Laravel application or Apache.